Toy Repair 101: Keep Beloved Toys Alive Longer
Toy Repair 101: Extending the Life of Your Child’s Beloved Playthings is a practical guide offering parents easy and effective methods to mend broken toys, fostering sustainability, saving money, and preserving cherished memories for children.
As parents, we’ve all witnessed the heartbreak when a favorite toy breaks. But before tossing it in the bin, consider Toy Repair 101: Extending the Life of Your Child’s Beloved Playthings. It’s often easier than you think to bring those cherished companions back to life.
Why Toy Repair Matters
In a world of disposable everything, repairing toys offers a refreshing alternative. It teaches valuable lessons to children about resourcefulness, care, and the value of things. Plus, it’s a budget-friendly way to keep the toy collection going.
Beyond the immediate benefits of saving money and reducing waste, toy repair provides an opportunity to connect with your child on a meaningful level. Working together to fix a broken toy can be a rewarding experience, creating lasting memories and strengthening your bond.
The Environmental Impact
Manufacturing new toys requires significant resources, including raw materials, energy, and water. Discarding broken toys contributes to landfill waste and pollution. By repairing toys, we can reduce our environmental footprint and teach our children the importance of sustainability.
Saving Money
The cost of new toys can quickly add up, especially with birthdays, holidays, and other special occasions. Repairing toys can save you a considerable amount of money over time. Instead of constantly replacing broken toys, you can extend their lifespan with a few simple repairs.
- Reduce environmental impact by decreasing landfill waste.
- Save money by avoiding frequent toy replacements.
- Teach children about sustainability and resourcefulness.
- Create lasting memories through collaborative repair projects.
By choosing to repair toys, you’re making a conscious decision to embrace sustainability, save money, and teach valuable life lessons to your children. It’s a win-win situation for everyone involved.
Essential Tools for Toy Repair
Before diving into toy repair, it’s helpful to gather a few essential tools. You likely already have many of these items at home. Having the right tools on hand will make the repair process easier and more efficient.
Think of this as building your own little toy repair workshop. Starting with the basics will let you handle most common toy malfunctions. As you become more experienced, you can expand your toolkit with specialized tools.
Basic Toolkit
Start with a basic toolkit that includes items such as:
- Needles and thread: Assorted sizes and colors for mending fabric toys.
- Glue: Super glue, fabric glue, and epoxy for different materials.
- Screwdrivers: Phillips head and flathead screwdrivers in various sizes.
Specialized Tools
For more complex repairs, you may need specialized tools such as:
- Pliers: For gripping and manipulating small parts.
- Soldering iron: For repairing electronic toys.
- Multimeter: For diagnosing electrical problems.
A well-equipped toy repair kit will empower you to tackle a wide range of repair projects, from simple sewing to more intricate electrical fixes. Remember to always prioritize safety and follow instructions carefully when using any tools.
Having the right tools makes the job easier and safer. A small investment in a good set of tools will pay off in the long run by extending the life of your child’s favorite toys.
Repairing Stuffed Animals
Stuffed animals are often the most loved and cuddled toys, making them prone to wear and tear. Rips, tears, and loose seams are common issues that can be easily repaired with a few simple techniques.
Don’t underestimate the emotional value of a stuffed animal. For many children, these soft companions provide comfort, security, and a sense of belonging. Repairing a beloved stuffed animal can be just as important as fixing any other type of toy.
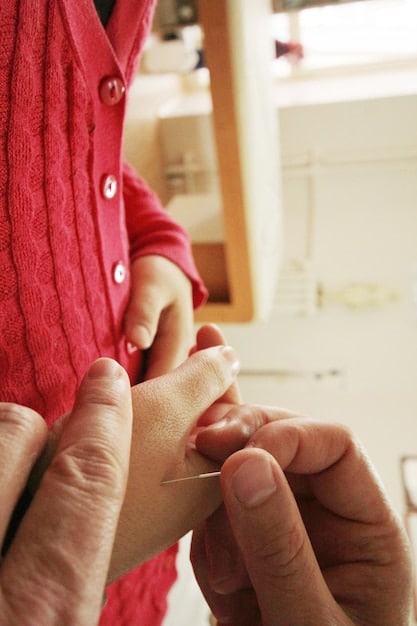
Mending Rips and Tears
To mend a rip or tear:
- Thread a needle with a matching color thread.
- Sew the edges of the rip together using a small, tight stitch.
- Reinforce the seam by sewing over it a second time.
Replacing Lost Eyes or Noses
- Find a replacement eye or nose that is similar in size and color.
- Attach the new eye or nose using glue or by sewing it securely in place.
- Ensure the attachment is strong and safe for the child.
With a little patience and some basic sewing skills, you can easily repair stuffed animals and keep them in good condition for years to come. Repairing a cherished stuffed animal can bring joy not only to the child but also to the parent who is preserving a precious friend.
Stuffed animal repairs are often simple and satisfying. Taking the time to mend a beloved plush toy can make a big difference in a child’s life, preserving their comfort and companionship.
Fixing Broken Plastic Toys
Plastic toys are durable but not indestructible. Cracks, breaks, and missing parts are common problems. Fortunately, many plastic toy repairs can be done with glue or epoxy.
When working with plastic toys, it’s essential to choose the right type of adhesive. Super glue is great for small, clean breaks, while epoxy is better for larger, more complex repairs. Always read and follow the manufacturer’s instructions when using any adhesive.
Gluing Cracked Plastic
- Clean the broken edges with soap and water and dry them thoroughly.
- Apply a thin layer of super glue to both edges.
- Press the edges together firmly and hold for 30-60 seconds until the glue sets.
Using Epoxy for Stronger Repairs
Epoxy consists of two parts that need to be mixed together before application. Follow these steps:
- Mix the epoxy according to the manufacturer’s instructions.
- Apply the epoxy to the broken surfaces.
- Clamp or tape the pieces together and let the epoxy cure completely.
By using the right techniques and adhesives, you can repair broken plastic toys and prevent them from ending up in the landfill. Not only that, it will also maintain the joy and engagement that toys provide to children.
Reviving Electronic Toys
Electronic toys can be more challenging to repair, but many issues can be resolved with basic troubleshooting and a few simple repairs. Batteries, wiring, and switches are common culprits.
Before attempting any repairs on electronic toys, always remove the batteries. Safety should be your top priority when working with electronics. If you’re not comfortable working with electronics, it’s best to seek help from a professional repair technician.
Replacing Batteries
- Check the batteries first, as this is often the simplest solution.
- Replace dead batteries with fresh ones of the correct type and voltage.
- Ensure the batteries are inserted correctly, following the polarity markings.
Checking Wiring and Switches
A loose wire or faulty switch can cause an electronic toy to malfunction. Here’s how to check them:
- Inspect the wiring for any breaks or loose connections.
- Solder any broken wires back together.
- Test the switches to ensure they are functioning correctly.
With some basic knowledge of electronics and careful attention to detail, you can often revive electronic toys and extend their lifespan. This not only saves money but also reduces electronic waste and promotes sustainability.
Repairing electronic toys may seem daunting, but with a little patience and the right tools, many common issues can be resolved. Start with the simple solutions, and don’t be afraid to seek help from a professional if needed.
Preventative Measures and Maintenance
Preventing toy damage is even better than repairing it. A few simple preventative measures can significantly extend the life of your child’s toys. Proper storage, regular cleaning, and careful handling are key.
Teaching children to care for their toys is an important life lesson. By instilling good habits from a young age, you can help them develop a sense of responsibility and appreciation for their belongings.
Proper Storage
- Store toys in designated areas to prevent damage and loss.
- Use storage bins or shelves to keep toys organized and protected.
- Avoid storing toys in direct sunlight or extreme temperatures.
Regular Cleaning
Regular cleaning not only keeps toys looking their best but also prevents the buildup of dirt and germs. Here’s how to clean toys:
- Wipe down plastic toys with a damp cloth and mild soap.
- Wash fabric toys in the washing machine on a gentle cycle.
- Disinfect toys regularly to prevent the spread of germs.
By implementing these preventative measures and maintenance tips, you can keep your child’s toys in good condition for years to come. This will not only save you money but also reduce waste and promote sustainability.
Preventative maintenance is the key to long-lasting toys. By taking a few simple steps, you can keep your child’s favorite playthings in good condition and extend their lifespan.
| Key Point | Brief Description |
|---|---|
| ♻️ Environmental Impact | Repairing toys reduces landfill waste and promotes sustainability. |
| 💰 Saving Money | Extending toy lifespans saves money by avoiding constant replacement costs. |
| 🧸 Repairing Stuffed Animals | Simple sewing techniques fix rips and reattach lost parts in plush toys. |
| 🔧 Essential Repair Tools | Basic kits with glue, screwdrivers, needles, and pliers handle common repairs. |
Frequently Asked Questions
▼
The most common reasons toys break include rough handling, accidental drops, and general wear and tear over time. Certain materials, like brittle plastic, are more prone to damage.
▼
Repairing even cheap toys can be worthwhile, especially from an environmental perspective. It also teaches kids about valuing and taking care of their belongings, no matter the cost.
▼
Super glue works well for small, clean breaks in plastic, while epoxy is better for stronger, more durable repairs. Fabric glue is ideal for plush toys, and always follow the glue instructions
▼
Always ensure all repairs are strong and secure. Avoid using small parts that could be choking hazards. Make sure any glued parts are fully cured and safe for your child to handle.
▼
Wipe plastic toys with a damp cloth and mild soap. Wash fabric toys in the washing machine on a gentle cycle. Use disinfectant wipes on toys regularly to prevent the spread of germs.
Conclusion
By embracing Toy Repair 101: Extending the Life of Your Child’s Beloved Playthings, you’re not only saving money and reducing waste but also teaching valuable lessons to your children. So, next time a toy breaks, resist the urge to throw it away. With a little effort, you can bring those cherished playthings back to life and create lasting memories along the way.


